There are the final images of my head:
Front View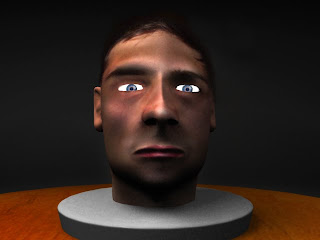
Side View
Overall I am pleased with the result, this project is the most complex model that I have ever made in 3d. I am somewhat more confident with the program, which is helpful because I will need more experience for the group work which will be starting shortly.
I may be able to use this for further pieces of work but more than likely now that I can create more complex models I will start a new factoring in all the mistakes that were made during this project.
Archives
As i had finished my model to the best of my ability, created the stage for it to be set within it was now time to have a look at lighting.
I have never really used much lighting apart from an omni light, which just creates some light from a point and then gives off some shadows etc. I wanted to see if i could create a more professional looking model by getting some decent lighting.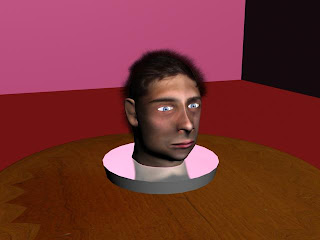
This is how the first initial render came out, this is with no lights and just using a scan line render. As you can see it is not very interesting there is not allot of shadows and due to the lack of the no lights the details in the face do not stand out as much.
Skylight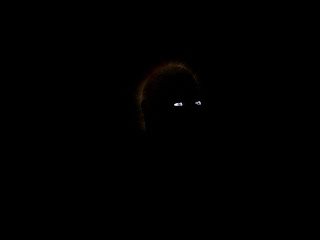
I wanted to see what a skylight would look like with the model, needless to say I do not think that I used to correct settings as all you can see is the eyes and the hair. I think that i will need to research more into how to use the spotlight for further projects.
Spotlight with a Plug in 
The above image was created using the Spot Light and a light tracer plug-in found within max.
I think it gave the overall image quite a warm look, making the table very bright and the spot light gave a good shadow to the side. I am quite pleased with this apart from there is no light on the background which I worked on so I will need to look further into lighting to accomplish that. But for a second attempt not too bad.
VRAY Lighting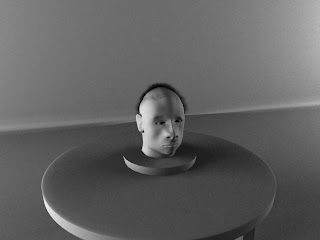
I decided to install VRay onto my computer as I had seen on allot of websites that it used for models to make them look awsome. I wanted to undetstand how it managed this and basically it uses millions of small lights on the scene that would take a user ages to make, and all the lights rebound off each surface acting like real light sources.
As you can see from both the grey scale render and the coloured render, VRay lights do work quite well. They have not worked on the model very well because it is very dark and has casued it to look like the room is very very dark not showing allot of detail on the face. The table and the background in my opinion look the best and quite realistic, when I added more vray lights to the scene it all went super bright and you could not see anything so I decided I did not know enough about vray lighting for this project.
Mental Ray
In the above image I used some omni lights and the mental ray render, I think this is the best outcome for the face besides using the warm plugin. It shows quite allot of light on the model and shadows as well as lighting up the sourrounding and the table itself. For the final images that I will show I will zoom the camera in more to show more detail of the model and less of the table.
1st Attempt
I have not had allot of experience when it comes to setting up stages for models. But I wanted somewhere to put my model head that had taken allot of time and effort to make and look as good as I could.
I started off by just adding some squares to the background so that it gave the impression my head was in a room, I also added a wooden table just to add some close texture and not have the head and stand float in thin air.
I liked the idea of the table as it worked well, but felt the background was missing something and I did not want to spend time making the background as it would take the viewers eye away from the piece itself.
The Dome Idea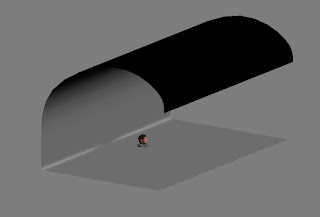
I started to look online for the best ways to construct a housing for a model, what type professionals use to show off there models. Most of them were domed shaped, this was so when lights were added the light would reflect of all the areas and create a more vibrant realistic and generally better looking model.
I decided to use a curved dome that was flat on the bottom and then curved over (giving the model a housing above) this will also make my life allot easier when it came to adding lights.
Conclusion
I know the backdrop looks very boring but as mentioned I did not want to take anything away from the model itself, this dome shape will help the model look better and as the viewer will never see the full scale it does not matter how it looks.

After seeing what my head looked like without my spiky hair, I decided that I needed to find a way to make it. The reason for this is because it looks very computer generated and not realistic because I don't have a flat head. So when looking at the image this is the first thing that you notice instead of looking at the overall model.
I also decided to a stand for my head, I did not want my head to just be floating and wanted it to be within a scene that I will create soon. (Once again to make the image more realistic)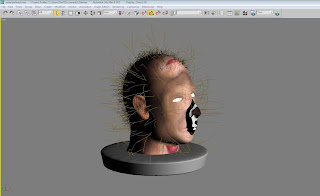
When I add the "Hair and Furr" Modifier to the face, it moves the material out of place and makes it impossible to move the angle into the correct place. The tiling stops working and it basically messes up the whole image that is wrapped around the face.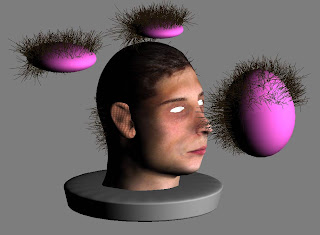
I decided to try a different approach instead of adding the hair to the actual model itself, I had the idea to add the hair and furr modifier to a sphere within the model. Luckily because I have spiky hair it would come through the model and give the impression that it is growing from the model.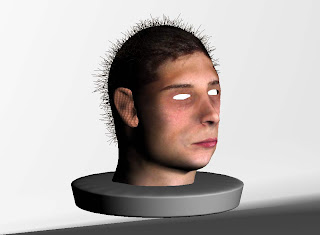
As you can see it gives the illusion of hair coming from the model, its not perfect but it looks better than just having a rounded head. Letting the user look more at the details on the face and the complexity in within the modeling and texture.
BMP maps are used to enhance the details of the texture that you are using on an object.
They basically consist of white and Grey lines to enhance the areas, they are very simple to make all you have to do is copy the image that you use for your main texture.
Insert the image into Photoshop, adjust the levels so that the low lights and the highlights stand out more.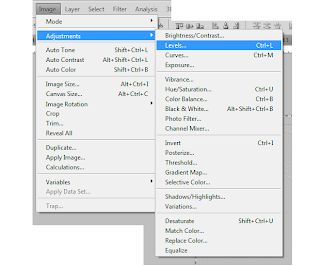
Then you simply add the filter, high pass. this makes the image look like it has been carved into metal. Removing all the different colors and just showing all the small details.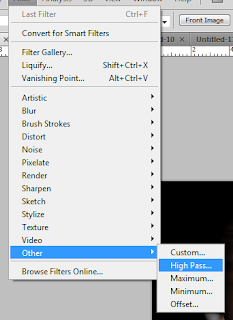
BMP Map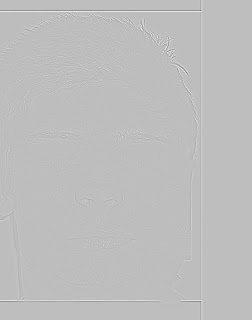
As you can see from the image above you cant really see that much, but yo can see hairline details and these when applied to the map on the texture will make the details stand out from the flat surface.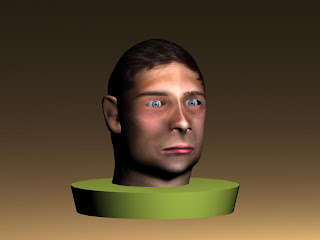
Mine has now shown up tons of detail, this may because of the settings that I used with the high pass, not making the lines strong enough. But it does make the texture look more human, instead of just a flat wrapping.
I really did not want to use UVW mapping on the ear, as it caused me so many problems before.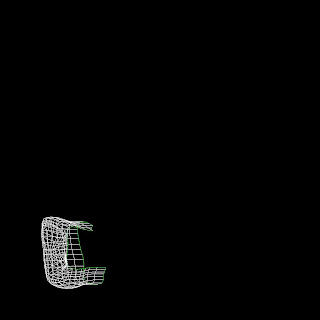
I managed to get a decent UVW map of the ear, so I was more open to making a UVW mapping. I then transferred this to photoshop, and then pasted the image of my ear over the top.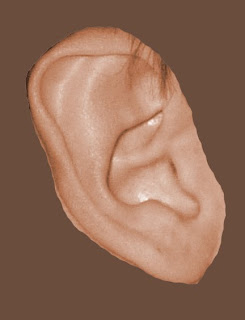
The above image, was the image of my ear that I used. As i used this as a reference place all the curves and bulges should be in the same place.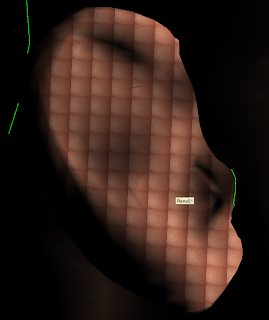
When I applied the material to the ear, it would only work when it was tiles loads. So basically my UVW mapping once again had failed to work, I spent hours with different methods trying to get the texture to work.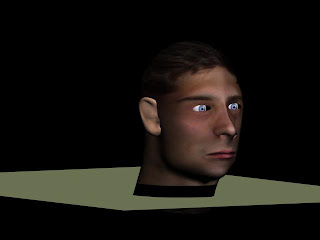
In the end I had to basically choose a color that matched the face, it does not look perfect but it is the best that I could come up with. Once there is lighting added and shadows, also if i successfully manage to add some hair using the hair and furr modifier. Then it should cover the ridge and make the head look better overall.
I wanted to mention this problem as it has casued me allot of greif thoughout the project.
I have noticed this as a major problem throughout the project that because I have a copy of 3DStudioMax 10 instead of 9 which is installed on the university computers.
I found that when I tried to open them in a lower version I was getting the error messages shown below: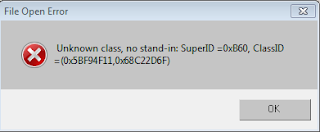
Unlike Photoshop and Microsoft word which is backwards compatible, 3DSMax however is not. This means that I had to export the models from version 10 into 9, which can cause errors such as when I added modifiers they would be molded to the model and then cannot be turned off.
The reason that I don't have Version 9 is because it would not work and install with Vista that is installed on my pc and did not work with my mac (due to not being compatible) but luckily after a long process I managed to get it working and now can move on with my work so that it can be opened at university and by the moderator when marked.
UVM Mapping Green Lines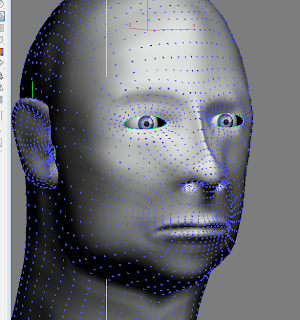
It was now time to start on the UVW Mapping, I understood the method behind it.
Basically taking the polygons and laying them out flat, so that it can then be exported into programs such as Photoshop to overlay the skin and textures. This all sounds easy enough until I tried it for myself. Lets just say that my UVW Mapping was extremely confusing due to my lack of experience, with both the program and never having used UVW Maps before.
I Followed his tutorials as much as possible, but i was having problems with the mapping as it did not appear as it should.
UVW Mapping Edit View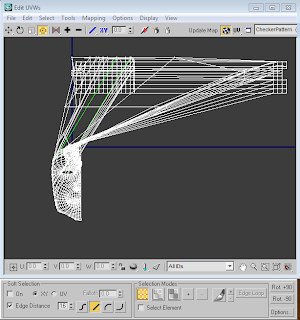
The above image shows how my UVW mapping looked when it was unfolded, the top part of the head is for some reason moved over loads, causing the head to distort, The ear is located behind the head and is really hard to click on and move out the way.
Current Face without any editing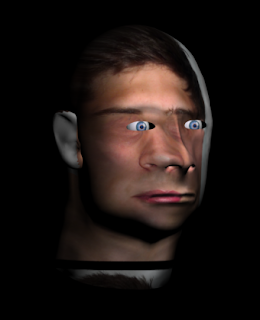
I ended up having to use, the part of the mask that was salvageable and put a version of my face over it, I tested it out and ended up with the image below. It had managed to wrap around the face but needed moving about and then further editing in Photoshop.
Editing in Max and Final Result
After allot of messing around I managed to move it into place with my face by adjusting the settings of the material. This is defiantly not the correct way to do it and he does not tell you this in the tutorials. But due to the fact that my UVW was so messed up, I had to make some changes of my own.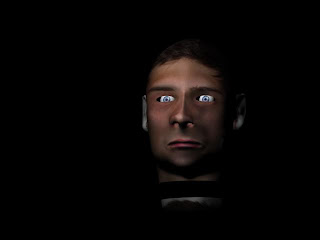
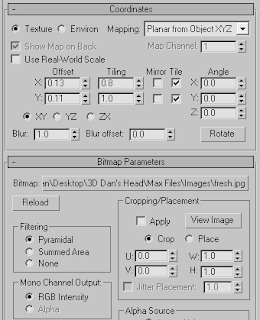
As you can see from the settings above, I had to use the texture map "Planar from Object XYZ" Which should not have been used. But it was the only way to get the texture to line up with the model.
I also had to change the tiling on the image so that it stretched across the face, basically the UVW map that i used gave me a rough outline for the face so I could use max to manipulate it into something usable.
The Final UVW Mapping Image
Here is the final image that was created in Photoshop to make the texture for the model. As you can see i have to extend out my chin and the right side of my check. I accomplished this by using the "Clone Stamp Tool" selecting parts of my face and then basically drawing them onto the blank areas.
I removed my eyes so that there was nothing showing on the model, using the same method with the clone stamp tool, I also have to move my mouth over to fit in with the model (I am not sure why because it should be in the same place, but if it makes it look better on the model then it does the job.)
Conclusion
After using the UVW mapping tool, I have realised that I am not a great lover of it. When using it on the planes it worked fine, as they are a flat model that has not been manipluated, when using it on a model as complex as the head it seemed to cause me allot of problems.
That becasue I had moved my model from 3D Studio max 10 to 9. I had a turbo smooth left on and when I exsproted it, it applied it to the mesh and I was unable to turn it off. So this may have casued more problems with the mapping.
I thought now was a good time to start adding some hair to my 3d Model.
Luckily enough you do not have to make each strand of hair, there is a modifier called "Hair and Fur" which basically adds hair to the entire model. Selecting the areas you want hair to grow, you then can cut the hair, brush it and style it as well as change the color and attributes.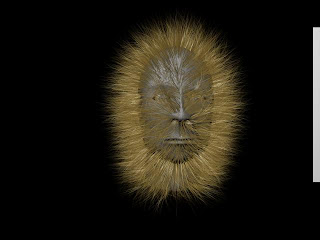
Now i have had some bad times in my day, but this takes the biscuit!! I added the hair and furr modifier and it made me look like something out "The Lion King".
The idea of the hair modifier sounded easy, but after working with it I found that creating my own hairstyle was rather difficult, the closest thing to my hair that I could create ("Spikes") is the following: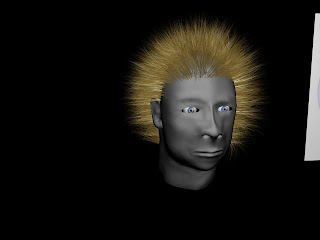
Ignore the color, but as you can see, it still looks nothing like my hair at all!! That is a massive Afro, i tried to make it shorter but really struggled with it.
I have decided to use mapping and just add the hair from my original image, because i think it will look more realistic than adding some Afro hair!!
It was rather scary looking at a face with no eyes, it does not explain how to create the eyes in the tutorial. But how hard can it be??I Simply just some spheres, moved them into the the head and added an "eye" material. But I then realized the eyes looked like something out of a horror film, I did not like this look as it made the face look like a cartoon, distracting the notice away from the head which I had slaved over.

The image above shows my initial go at putting in eyes, I just took a texture from Google of an eye. I did not realize that it was vector art, this meant that it was really shiny and crisp and made it look like my 3D was suffering from pink eye.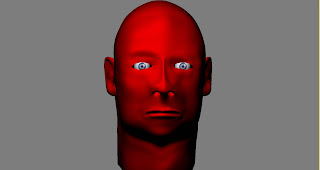
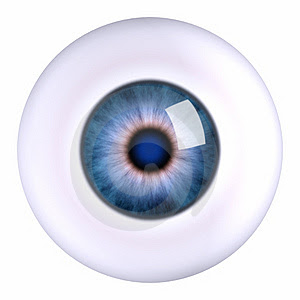
I then changed the eyes to a more realistic looking blue version, They still look really quite creepy as I look like a serial killer. But I am on the right track to making the eyes look realistic.
They need to be darkened as they are very bright, as when the face is skinned they will look too bright. This can also be changed when the lighting is added, with shadows.
As I have mentioned I believed that the ear would be really hard to do and give me allot of problems. It did cause me some issues but not as bad as i thought....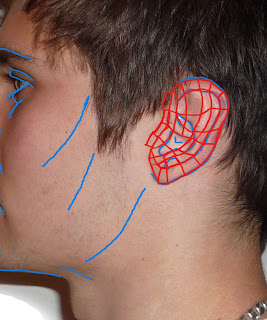
Typology of the Ear
First as like before with the face, I needed to make the typography for the ear (As shown above) following the bone and skin structure of the ear. It was not that tricky to do as It was such a small area to cover compared to the face.
I watched the tutorial and saw how he created his ear, I then followed the same technique. I spent a good time on this as alike the face, if I messed this up then it would make the ear harder to model down the line. So this part is CRUCIAL!!
Creating an Editable Poly
Its the same process as making the "mask", simply creating all the lines over the topology then welding them together and converting them to an editable poly.
Once the editable poly is made you can then move the vertexes (as like with the face) in the front and side view to the appropriate distance from the face.
Attaching the Ear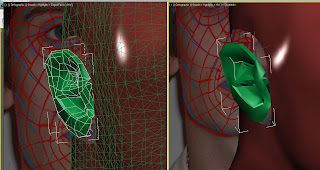
It was really tricky to manipulate the ear, due to its complexity and angles near the head. I had to keep moving and rotating the perspective to see it from all angles, to get the desired look. It was also quite tricky as I just rather boney ears so there are allot of curves, divots and bulges.
Welding the ear to the Head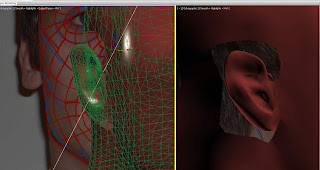
When watching the video tutorial, he made it look very simple to do. Needless to say it was not!!
I started off by deleting an area from the head by selecting the faces, enough to accommodate the ear. Then selecting the head and clicking the attach button, then clicking the ear to attach it. This didn't actually attach it but it made it part of the head, which meant I could see points from both the ear and the head so they could be lined up.
I then moved the ear over and staring welding the points to the head.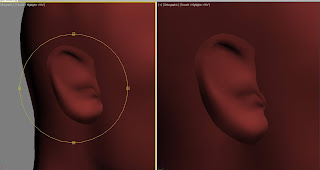
It has created a little bit of a ridge when attached to the ear, it is an not as smooth as i would like it but luckily for me i have side burns which will cover where the ear meets the head. So you wont see that connection line.
Overall the ear has been quite a dissatisfying task, 3D is not my strongest skill because it easily frustrates me and working on an object that small and complex was really rather challenging.
I found it hard to move around the object but found a new keyboard shortcut of holding alt + using the scroll will to quickly pan round the object. ( A shortcut that most people probably know but I myself was unaware of.)
Now that the ear is connected, all the modeling is pretty much completed. I will now be moving onto the texture mapping.
It was now time to create the side and back of the head and also the neck.
It was actually rather simple. By adding a sphere and attaching it to the model, then deleted the inner and rounded parts near the bottom (show above in red).
Then simply using the edge tool to pull out the polygons, shown with arrows. To form the neck and the side of the head which was then joint up to the sphere.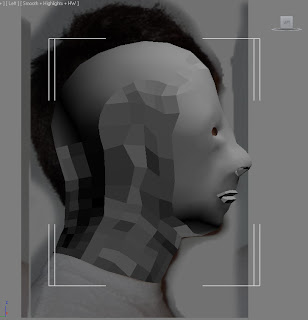
The image above shows how all the polygons looked once they had been connected together and welded. I will eventually be making a hole for the ear but I filled in all the gaps for the time being as I was not sure where to ear would be located and what size it would be.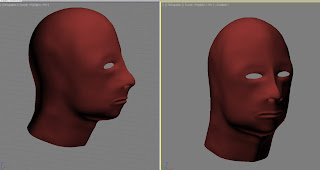
I have now completed the basic structure of the head (excluding the ear), it is actually starting to look like a real person with the turbo smooth modifier turned on.
Now i have created the nose it is time to move onto making the mouth.
This was not explained in the tutorial, so I had to run this one alone. But really how hard is a mouth to create!! I was hoping that this was not going to be too difficult, and luckily I did not struggle with it that much and it came out pretty good.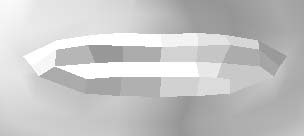
I started of by basically using the edge tool selecting the mouth edges, holding shift and pulling out more polygons. Once they had been pulled out using the same method as the face, of selecting the vertex points and welding them together to stop breaking, holes being formed. I then used the create the tool to create more middle polygons to link them all together.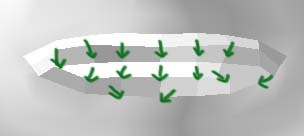
You can see from the image above the direction of the flow from the polygons, (moving outwards and then inwards.)
You can see better from the side angle, how the mouth is positioned and how it lines up with the face. With good definition for both the top and bottom lip.
I had to follow an new line and not use my mouth from the images, because it was too small and would have looked out of proportion with the rest of the face. I used the original shape just on a bit of a larger scale.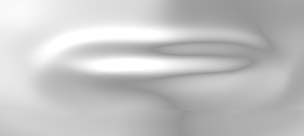
Here is the finished mouth after it has been turbo smoothed, it does look like he is pouting quite allot or was that me.
Overall the mouth has come out well next I am going to have to tackle the ear, which i feel is going to be very very tricky.
The Amazing Blog of Daniel Reeve
My personal website DJR DESIGNS is in the navigation bar at the top, if you want to see some of my best work and designs. If not then carry on reading and discover how an amateur 3D designer works :D
Archives
-
▼
2009
(25)
-
▼
October
(21)
- Final Finished Head
- Experimenting with lighting
- Setting up The Stage
- Attempt 2 of Adding Hair
- BMP Map
- Ear Texture, UVW MAPPING???
- Using 3D Studio Max 10!!
- UVW Mapping
- Lets get Hairy!!!
- Video of the Head
- Adding CREEEPY Eyes
- Making the Ear...
- Creating the Back of the Head
- Creating the Mouth
- Creating the Nose
- Forgetting to BLOG!!
- Symmetry
- Phantom of the Opera!!
- Flat Mask
- Line UP!!!!!
- 3D Studio Max Plates
-
▼
October
(21)


