UVM Mapping Green Lines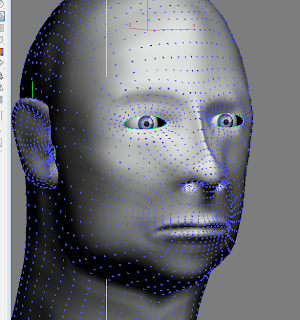
It was now time to start on the UVW Mapping, I understood the method behind it.
Basically taking the polygons and laying them out flat, so that it can then be exported into programs such as Photoshop to overlay the skin and textures. This all sounds easy enough until I tried it for myself. Lets just say that my UVW Mapping was extremely confusing due to my lack of experience, with both the program and never having used UVW Maps before.
I Followed his tutorials as much as possible, but i was having problems with the mapping as it did not appear as it should.
UVW Mapping Edit View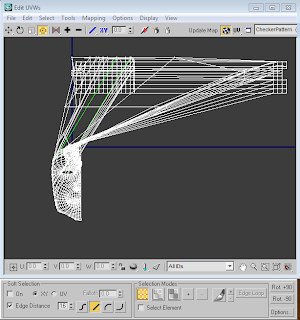
The above image shows how my UVW mapping looked when it was unfolded, the top part of the head is for some reason moved over loads, causing the head to distort, The ear is located behind the head and is really hard to click on and move out the way.
Current Face without any editing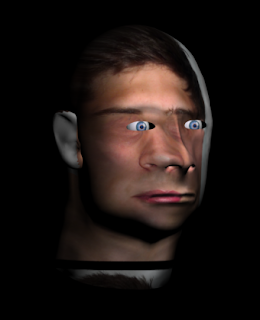
I ended up having to use, the part of the mask that was salvageable and put a version of my face over it, I tested it out and ended up with the image below. It had managed to wrap around the face but needed moving about and then further editing in Photoshop.
Editing in Max and Final Result
After allot of messing around I managed to move it into place with my face by adjusting the settings of the material. This is defiantly not the correct way to do it and he does not tell you this in the tutorials. But due to the fact that my UVW was so messed up, I had to make some changes of my own.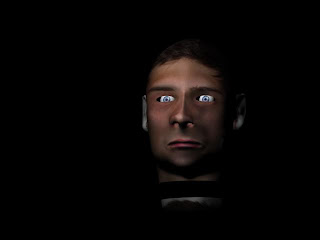
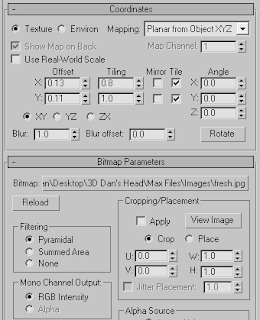
As you can see from the settings above, I had to use the texture map "Planar from Object XYZ" Which should not have been used. But it was the only way to get the texture to line up with the model.
I also had to change the tiling on the image so that it stretched across the face, basically the UVW map that i used gave me a rough outline for the face so I could use max to manipulate it into something usable.
The Final UVW Mapping Image
Here is the final image that was created in Photoshop to make the texture for the model. As you can see i have to extend out my chin and the right side of my check. I accomplished this by using the "Clone Stamp Tool" selecting parts of my face and then basically drawing them onto the blank areas.
I removed my eyes so that there was nothing showing on the model, using the same method with the clone stamp tool, I also have to move my mouth over to fit in with the model (I am not sure why because it should be in the same place, but if it makes it look better on the model then it does the job.)
Conclusion
After using the UVW mapping tool, I have realised that I am not a great lover of it. When using it on the planes it worked fine, as they are a flat model that has not been manipluated, when using it on a model as complex as the head it seemed to cause me allot of problems.
That becasue I had moved my model from 3D Studio max 10 to 9. I had a turbo smooth left on and when I exsproted it, it applied it to the mesh and I was unable to turn it off. So this may have casued more problems with the mapping.
The Amazing Blog of Daniel Reeve
The blog that you see before you is an online thinking place for all my University Work. Before you laugh most of it contains 3D work, which I would not call my best area of expertise!! I am a 2D Illustrator at heart but love to try out new stuff and see what else I can create.
My personal website DJR DESIGNS is in the navigation bar at the top, if you want to see some of my best work and designs. If not then carry on reading and discover how an amateur 3D designer works :D
My personal website DJR DESIGNS is in the navigation bar at the top, if you want to see some of my best work and designs. If not then carry on reading and discover how an amateur 3D designer works :D
Archives
-
▼
2009
(25)
-
▼
October
(21)
- Final Finished Head
- Experimenting with lighting
- Setting up The Stage
- Attempt 2 of Adding Hair
- BMP Map
- Ear Texture, UVW MAPPING???
- Using 3D Studio Max 10!!
- UVW Mapping
- Lets get Hairy!!!
- Video of the Head
- Adding CREEEPY Eyes
- Making the Ear...
- Creating the Back of the Head
- Creating the Mouth
- Creating the Nose
- Forgetting to BLOG!!
- Symmetry
- Phantom of the Opera!!
- Flat Mask
- Line UP!!!!!
- 3D Studio Max Plates
-
▼
October
(21)


0 comments