As i had finished my model to the best of my ability, created the stage for it to be set within it was now time to have a look at lighting.
I have never really used much lighting apart from an omni light, which just creates some light from a point and then gives off some shadows etc. I wanted to see if i could create a more professional looking model by getting some decent lighting.
This is how the first initial render came out, this is with no lights and just using a scan line render. As you can see it is not very interesting there is not allot of shadows and due to the lack of the no lights the details in the face do not stand out as much.
Skylight
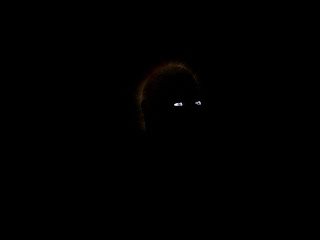
I wanted to see what a skylight would look like with the model, needless to say I do not think that I used to correct settings as all you can see is the eyes and the hair. I think that i will need to research more into how to use the spotlight for further projects.
Spotlight with a Plug in 
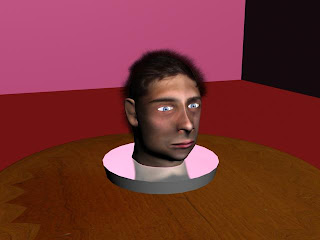
The above image was created using the Spot Light and a light tracer plug-in found within max.
I think it gave the overall image quite a warm look, making the table very bright and the spot light gave a good shadow to the side. I am quite pleased with this apart from there is no light on the background which I worked on so I will need to look further into lighting to accomplish that. But for a second attempt not too bad.
VRAY Lighting
I decided to install VRay onto my computer as I had seen on allot of websites that it used for models to make them look awsome. I wanted to undetstand how it managed this and basically it uses millions of small lights on the scene that would take a user ages to make, and all the lights rebound off each surface acting like real light sources.
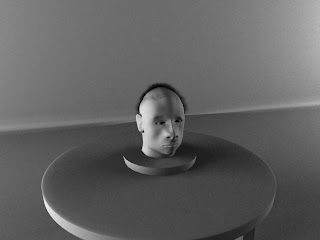
As you can see from both the grey scale render and the coloured render, VRay lights do work quite well. They have not worked on the model very well because it is very dark and has casued it to look like the room is very very dark not showing allot of detail on the face. The table and the background in my opinion look the best and quite realistic, when I added more vray lights to the scene it all went super bright and you could not see anything so I decided I did not know enough about vray lighting for this project.
Mental Ray
In the above image I used some omni lights and the mental ray render, I think this is the best outcome for the face besides using the warm plugin. It shows quite allot of light on the model and shadows as well as lighting up the sourrounding and the table itself. For the final images that I will show I will zoom the camera in more to show more detail of the model and less of the table.
The Amazing Blog of Daniel Reeve
The blog that you see before you is an online thinking place for all my University Work. Before you laugh most of it contains 3D work, which I would not call my best area of expertise!! I am a 2D Illustrator at heart but love to try out new stuff and see what else I can create.
My personal website DJR DESIGNS is in the navigation bar at the top, if you want to see some of my best work and designs. If not then carry on reading and discover how an amateur 3D designer works :D
My personal website DJR DESIGNS is in the navigation bar at the top, if you want to see some of my best work and designs. If not then carry on reading and discover how an amateur 3D designer works :D
Archives
-
▼
2009
(25)
-
▼
October
(21)
- Final Finished Head
- Experimenting with lighting
- Setting up The Stage
- Attempt 2 of Adding Hair
- BMP Map
- Ear Texture, UVW MAPPING???
- Using 3D Studio Max 10!!
- UVW Mapping
- Lets get Hairy!!!
- Video of the Head
- Adding CREEEPY Eyes
- Making the Ear...
- Creating the Back of the Head
- Creating the Mouth
- Creating the Nose
- Forgetting to BLOG!!
- Symmetry
- Phantom of the Opera!!
- Flat Mask
- Line UP!!!!!
- 3D Studio Max Plates
-
▼
October
(21)


0 comments